Normalize audio clips to a peak or loudness level
Normalize clips to a target peak or to a loudness in LUFS, for one clip or a whole pack, and see the output level and any clipping before you save.
Search for “unity normalize audio” and the first result is Unity’s page for the Audio Normalize Effect, a mixer effect that changes gain while the game runs. It never touches a file. The import settings have a Normalize checkbox too, but it only works together with Force To Mono. If you want a quiet clip to be louder in the file itself, or a pack of sounds to sit at one level, neither one does it.
Normalize to a peak
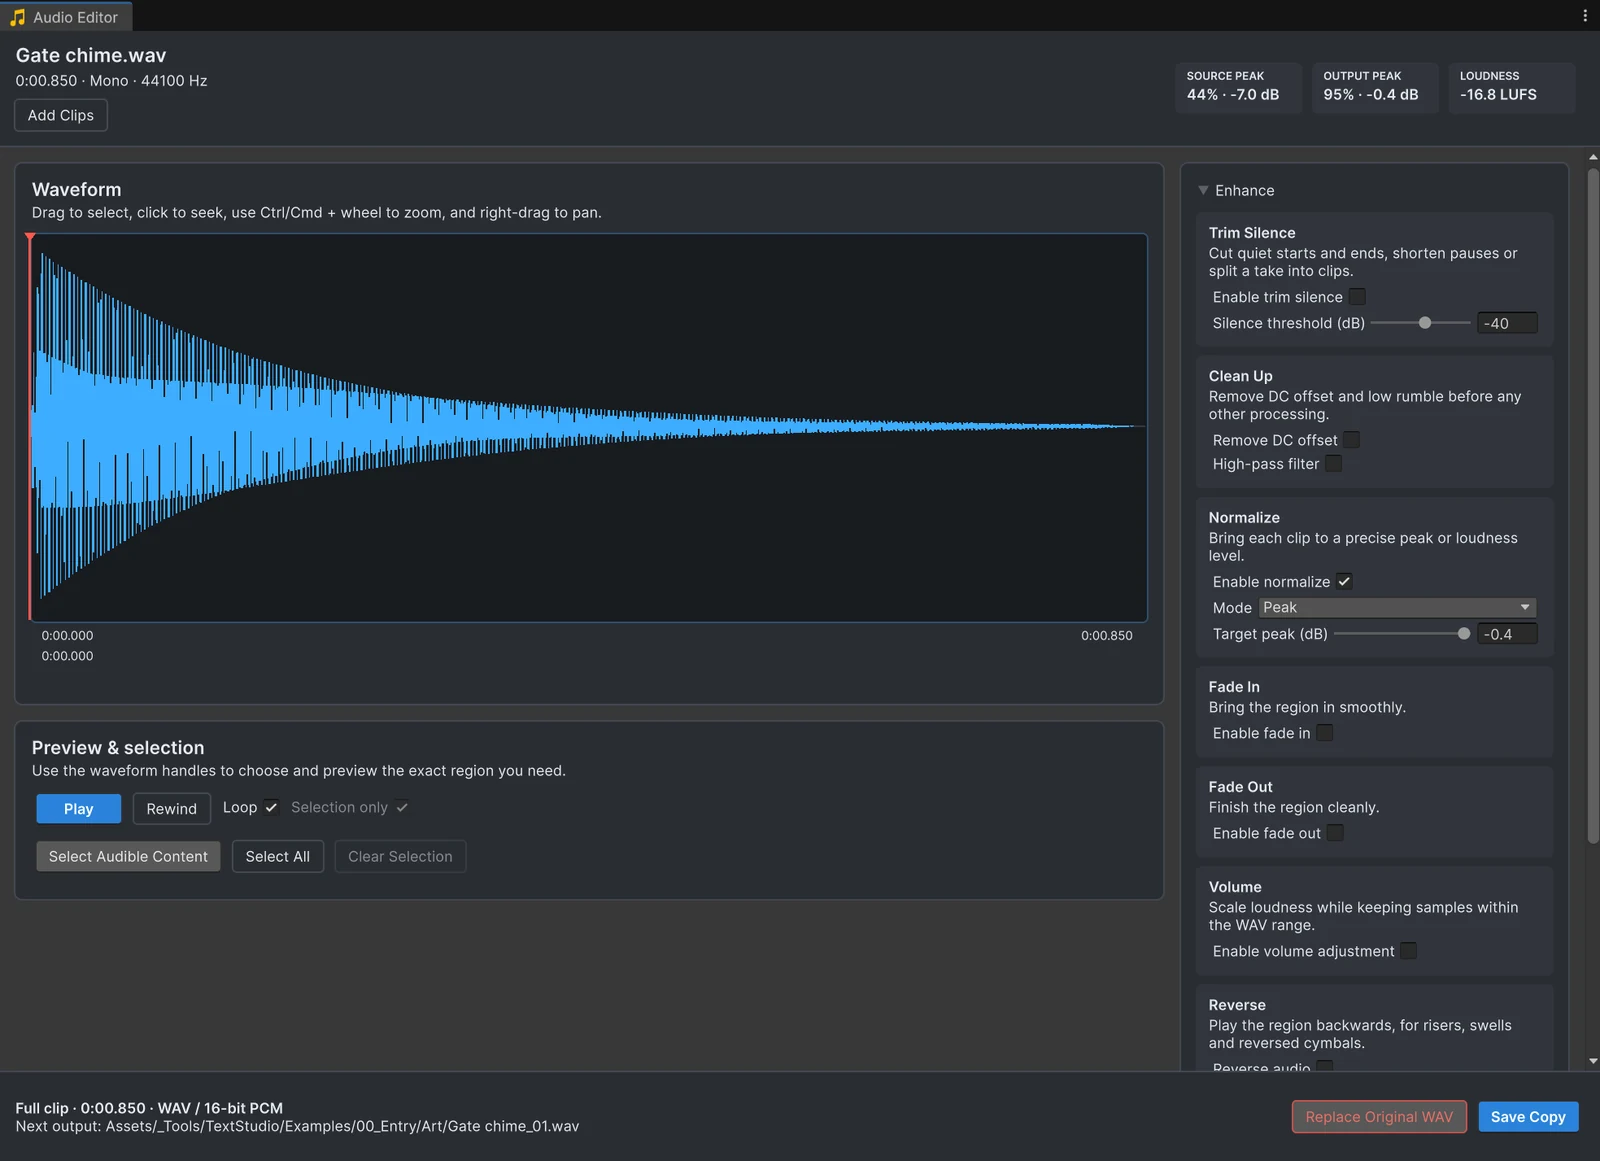
- Open the clip with Edit Audio. The header shows SOURCE PEAK, the loudest sample of the original, next to OUTPUT PEAK and LOUDNESS.
- Select a region, or leave the selection empty to work on the whole clip.
- In Enhance, enable Normalize, keep the mode Peak and set Target peak (dB). The default of -0.4 dB leaves a little headroom below full scale.
- Watch OUTPUT PEAK: the loudest sample now sits exactly at the target, and everything else is scaled by the same amount.
- Press Space to listen, then Save Copy to write the result as a new WAV.
Peak normalization scales the whole region by one factor, so the balance between loud and soft parts stays the same. A quiet chime with a peak of -7 dB gets about 6.6 dB louder throughout.
Normalize to a loudness
Two clips with the same peak can sound very different: a short click and a sustained drone, for example. Switch Normalize to Loudness (LUFS) to match how loud clips feel instead. Audio Tools measures integrated loudness per ITU-R BS.1770 and scales the clip to the Target loudness, -23 LUFS by default, while the Peak ceiling, -1 dB by default, keeps peaks from clipping. The LOUDNESS readout in the header shows the measured value.
Loudness pays off most across a set: open all the footsteps or all the UI clicks together, normalize them to one target and save every copy in one pass, as the batch guide shows. Analyze lists the gain each file gets, so outliers stand out before you save.
Adjust the volume instead
When you want a clip a bit quieter or louder rather than at a fixed level, enable Volume and set it between 0 and 200 percent; the label shows the change in decibels, up to +6 dB. Volume combines with fades and the other effects, and every change previews from the original samples.
Clipping is shown before you save
Raising a clip can push samples past full scale. Audio Tools counts them and shows a warning at the bottom of the editor that says how many samples reach the clipping limit, before anything is saved. You can still export, but lowering the volume or the target usually sounds cleaner.
Levels in the file, balance in the mixer
Normalizing files gets every sound into a sensible range. The balance between groups, such as music under dialogue or UI above ambience, belongs in an Audio Mixer, where you can still change it late in production. The article on peak and loudness normalization has a step-by-step approach for leveling a whole pack.
Frequently asked questions
What does Normalize do in Unity's audio import settings?
It only applies together with Force To Mono. After mixing a clip down to one channel, Unity peak-normalizes it. Without Force To Mono, the import settings do not normalize the file.
Is the Audio Normalize Effect the same thing?
No. It is an effect for Unity's Audio Mixer that adjusts gain while the game runs. It does not change your audio files.
Peak or loudness: which mode should I use?
Loudness (LUFS) when sounds of one kind should feel equally loud, such as a pack of footsteps. Peak when you need a fixed amount of headroom, or for very short sounds that give a loudness meter little to measure.
What happens if I raise the level too far?
Samples that would go past full scale are clipped. Audio Tools shows the output peak and warns how many samples reach the clipping limit before you save. Loudness mode also respects a peak ceiling, -1 dB by default.
Trim, fade and normalize audio without leaving Unity.
Keep reading
 Article
Peak or loudness normalization for game sound effects
Normalizing every clip to the same peak does not make them equally loud. What peak and loudness normalization each do, what Unity's Normalize options really are, and a practical way to level a purchased sound pack.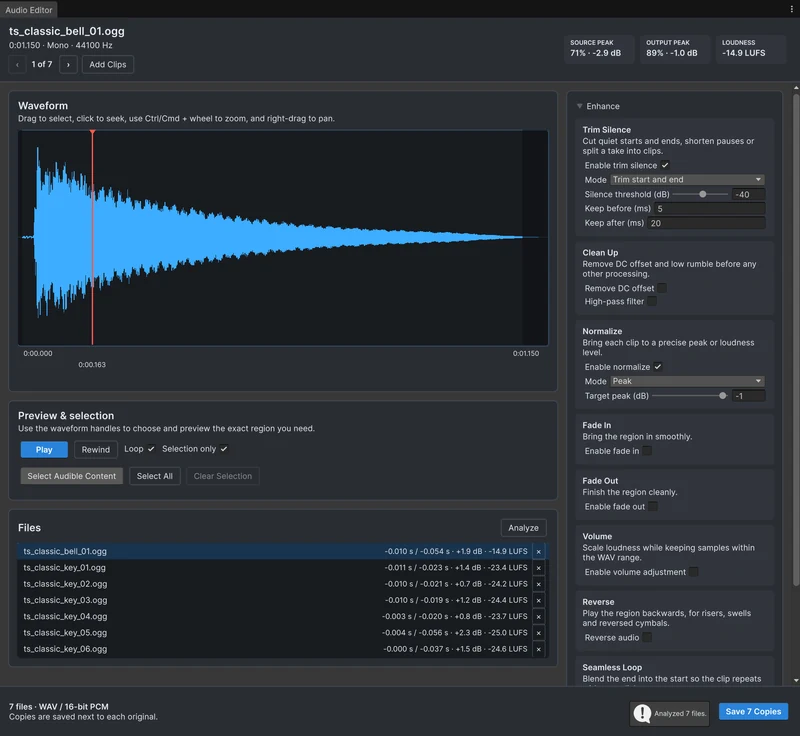 Use case
Process many audio clips at once
A sound pack needs the same fixes on every file: cut the silence, match the level, maybe mono and a new format. Open the clips or folders together in Audio Tools, apply the settings once, check them with Analyze, and save every copy in one pass. Use case