Cut one recording into separate sounds or voice lines
Split a long recording at its pauses into one numbered WAV per sound, or select each take by hand, without leaving Unity or touching the original.
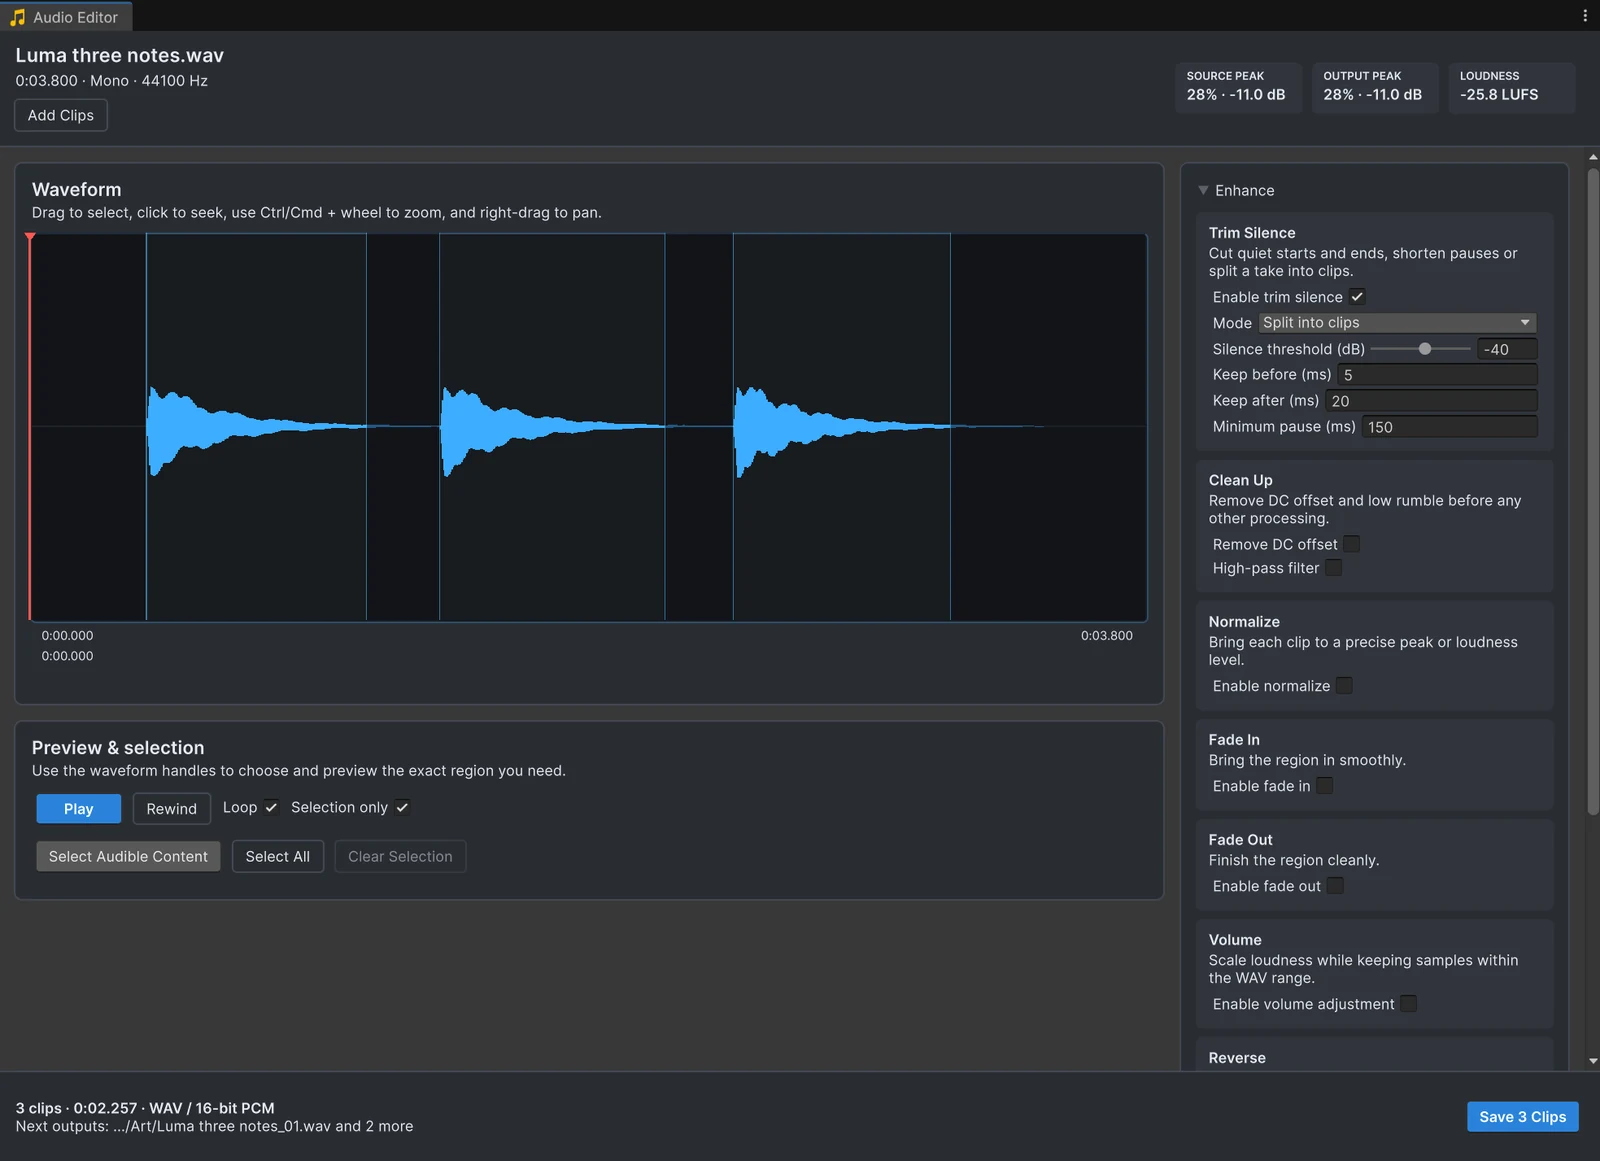
A recording session gives you one long file with ten takes. A sound pack ships twenty footsteps in a single WAV. A voice actor reads three alternative lines in a row. Before any of it is useful in a game, it has to become one file per sound. Audio Tools can split the file at its pauses in one save, or let you cut each part by hand.
Split at the pauses
- Open the recording with Edit Audio. The example on this page,
Luma three notes.wavfrom the Text Studio samples, holds three notes with pauses between them. - In the Trim Silence card, turn on Enable trim silence and set the mode to Split into clips.
- Check the clip borders the waveform marks. If a sound is cut in two, raise Minimum pause (ms); if two sounds stay together, lower it. Silence threshold (dB) decides what counts as a pause at all.
- Keep before (ms) and Keep after (ms) leave a margin around each sound, so attacks and tails stay intact.
- Press the primary button, which names the result, for example Save 3 Clips.
For the example file, Minimum pause (ms) had to come down from 300 to 150, because its pauses are only about a quarter of a second long. The footer then reads “3 clips” and the button Save 3 Clips. Each clip is written as its own WAV next to the original: Luma three notes_01.wav, _02, _03. Rename them in the Project window when you are done, for example to Luma note high.wav.
Cut by hand when there are no clear pauses
Some recordings have no silence between the parts you want, such as a sentence you want to split at a breath, or a riser that runs into an impact. Select each part on the waveform instead:
- Drag across the first part to select it. Zoom in with Ctrl or Cmd and the mouse wheel when the boundaries are close.
- Turn on Selection only and Loop, then press Space to hear the selection repeat. Adjust the handles until it starts and ends cleanly.
- Press Save Copy, then select the next part and save again. The footer shows which number the next file gets.
Keep the edges clean
If a new file clicks at its start or end, enable a short Fade In or Fade Out of a few milliseconds before saving. Settings stay enabled while you move from one part to the next, so one setup covers the whole session. See the fades guide for details.
The original stays as it was
Splitting never changes the recording you cut from. You can come back to it later for a take you skipped, or cut it differently for another use. To split several recordings with the same settings, open them together, as the batch guide describes.
Frequently asked questions
How do I cut an audio file into several clips in Unity?
Open it in Audio Tools, enable Trim Silence and choose Split into clips. Each sound between pauses becomes its own clip, and one save writes them all as numbered WAV files next to the original.
What if the pauses between sounds are very short?
Lower Minimum pause (ms) so shorter gaps count as split points, or raise it so short gaps inside one sound do not split it. For takes without clear pauses, select each part by hand and use Save Copy.
What are the new files called?
The original name plus a two-digit number: voice.wav becomes voice_01.wav, voice_02.wav and so on. Rename them in the Project window afterwards, as you would any asset.
Trim, fade and normalize audio without leaving Unity.
Keep reading
 Use case
Remove the silence that makes sounds play late
Many sound files start with a few hundred milliseconds of silence, and in a game that reads as lag. The Trim Silence card cuts it at the start and end, shortens long pauses inside a clip, and works on a whole folder in one pass.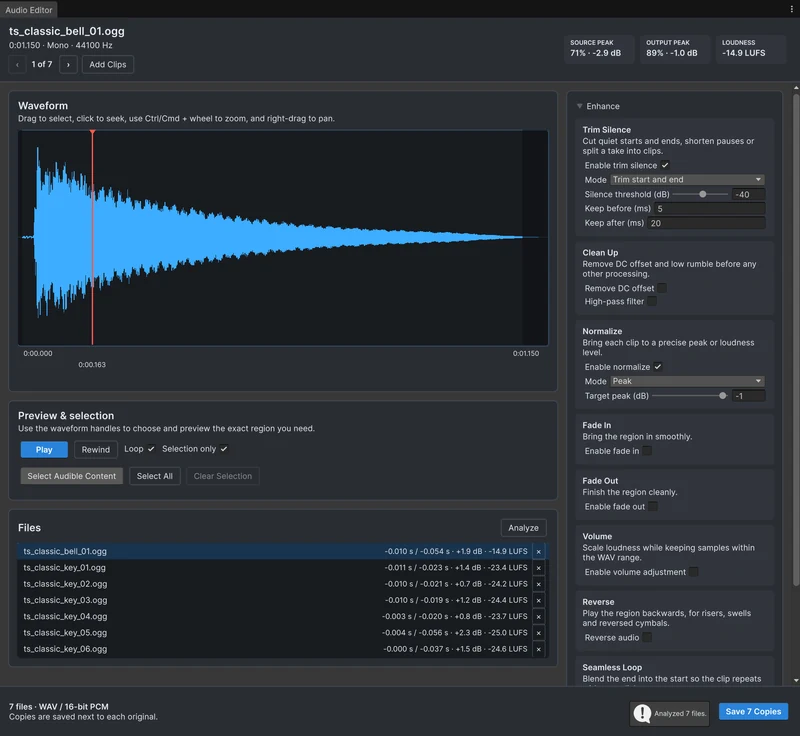 Use case
Process many audio clips at once
A sound pack needs the same fixes on every file: cut the silence, match the level, maybe mono and a new format. Open the clips or folders together in Audio Tools, apply the settings once, check them with Analyze, and save every copy in one pass. Use case