Getting Started
Installation
It is strongly recommended to remove any previous version of the Asset Inventory before installing a new version. The best way to do so is to close Unity and afterwards delete the full AssetInventory folder since used libraries cannot be replaced if Unity is active.
Install the package through the Unity Package Manager. When asked if to install additional dependencies, select Install/Upgrade, otherwise the asset will not work. Installed package dependencies include Newtonsoft Json, SharpLibZip and EditorCoroutines.
If you have many Unity projects, an alternative way of installing and maintaining the tool for you might be a package-based approach as described later in the “Installing as a package” chapter.
Blender, 3ds Max or Maya. It is recommended to at least install Blender (free) and the Text Mesh Pro package to make sure previews for .blend and UI prefab files are generated correctly.
Once installed you can access integrated tutorials which will guide you through the configuration and features. If the Unity Tutorials package is already installed, these will appear automatically. If not, you can install it at the launch screen of the tool, see next section.
Usage
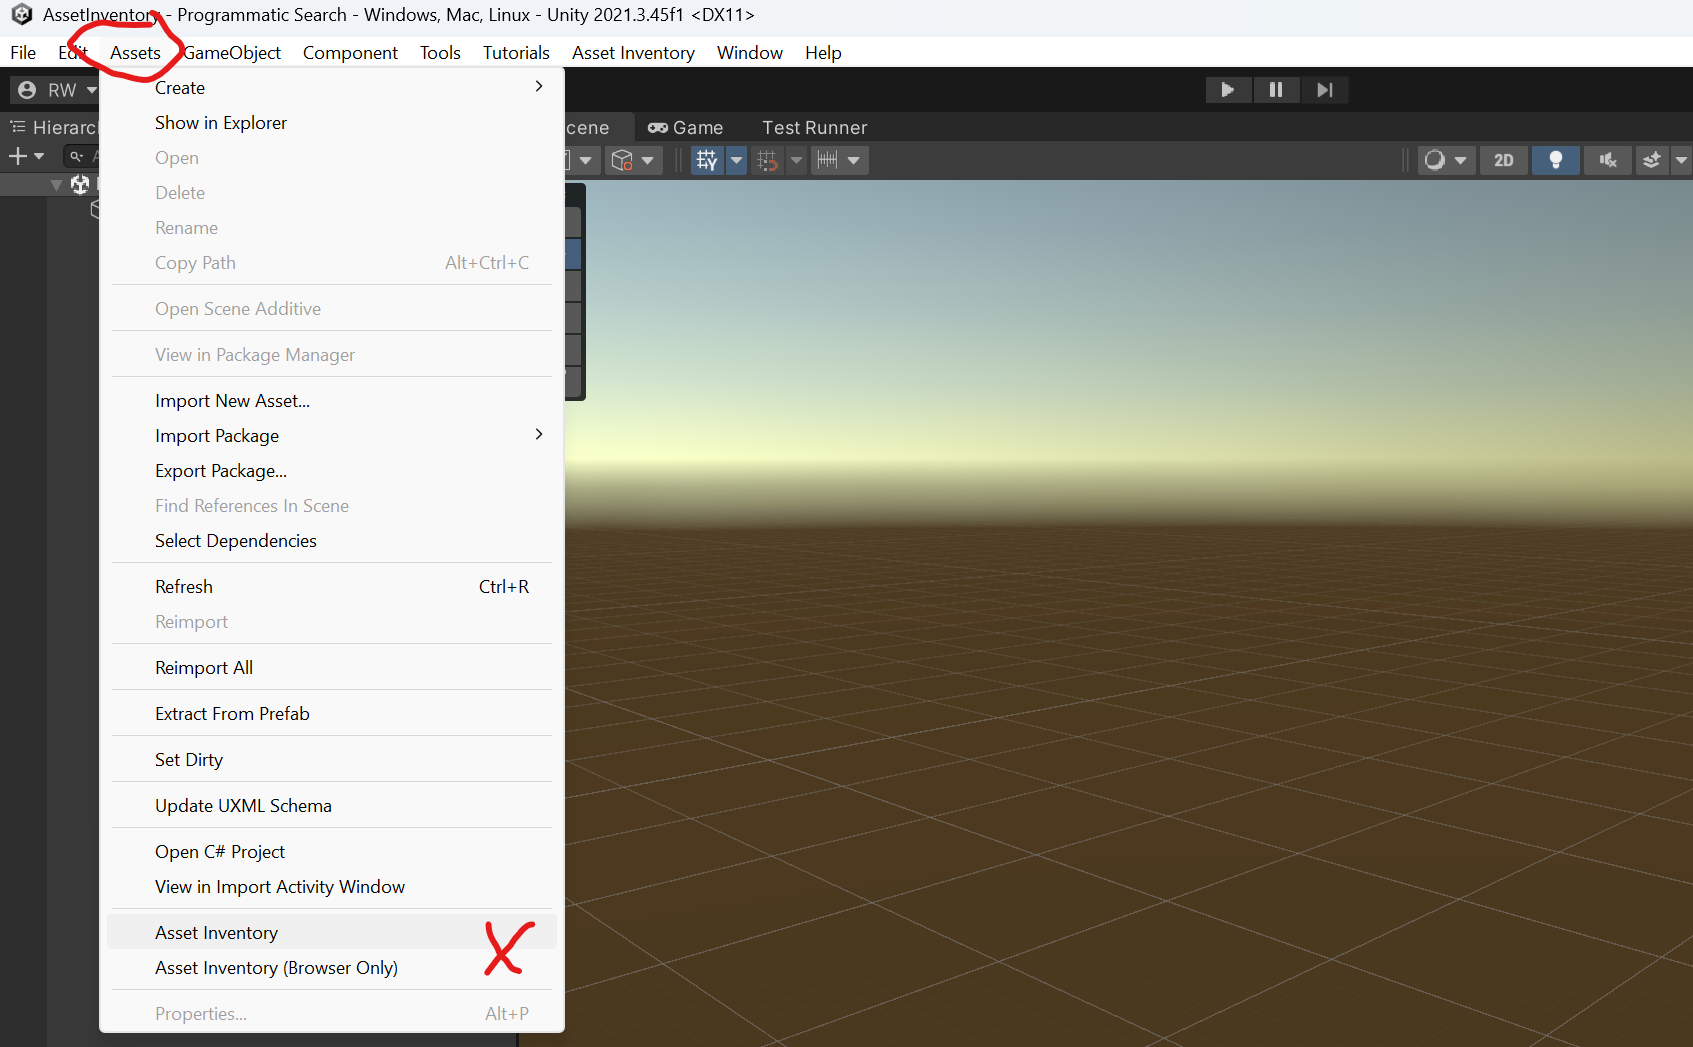
Open the Asset Inventory through the Assets menu.
The Setup Wizard will launch automatically. The default settings are usually good to go with and everything can be adjusted later, but some preferences make sense to check up-front. The main item to think about is where to store the database and caches since these require a fair amount of disk space for storing preview images and temporary files during extraction and browsing. You might also want to review bandwidth usage since downloading assets automatically might be taxing on your allowance.
The Setup Wizard also shows a storage requirements estimate so you can choose a database, cache, preview and backup location that has enough free space before large indexing runs begin.
Once the wizard is done, the initial indexing will start automatically. Only a fraction of your assets will be indexed at the first to give you a chance to evaluate the tool and setup. If you are happy how everything works, press the Run Actions button under Settings to compile the full index. This might take a couple of hours and is best run over night.
When everything is done it can be beneficial to delete your project’s Library folder which has accumulated lots of temporary unneeded data.
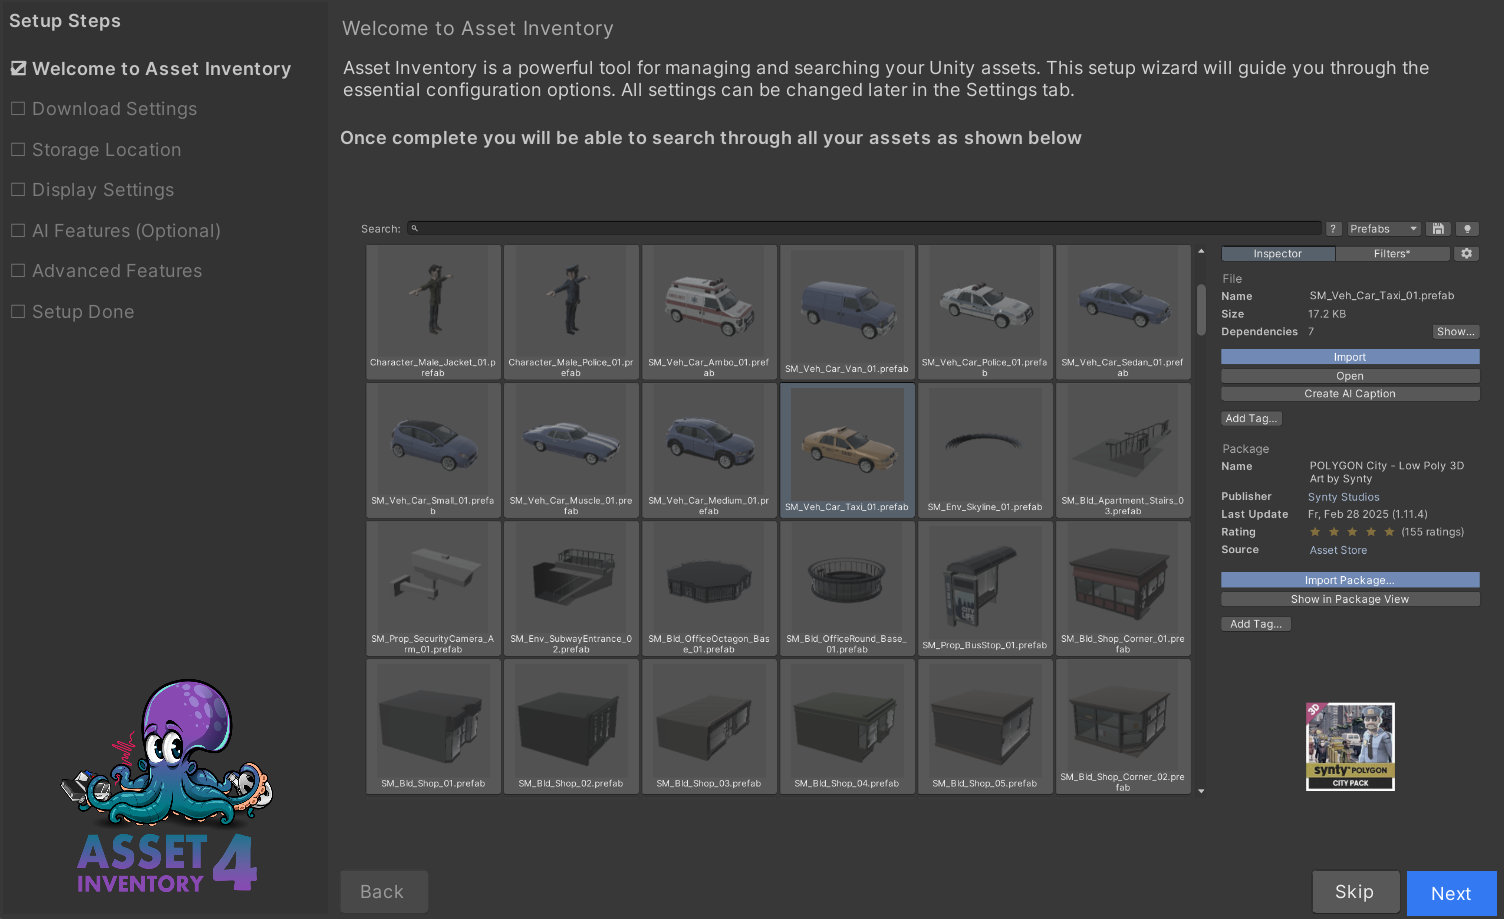
Whenever you purchase new packages or add new assets to your folders, make sure to press the Run Actions button under Settings once so that the index gets updated.
Tip: The UI displays only the core functionality (easy mode). You can access many additional options by holding down the CTRL key or pressing the eye icon at the top.
Performance
Here are things to consider to get the most out of the tool:
- If you own an SSD, consider storing at least the database on it. If space is an issue, this is the order of priority for the data to be stored on SSD:
- Database
- Previews
- Cache
- Backups (no real need to store on SSD)
- Run the initial indexing or bigger updates in a new empty Unity project and use the newest available stable Unity release. The indexing results will be stored in a central location for reuse in any other project. This will give you the highest indexing performance since no other assets/scripts need to be refreshed and new versions of Unity typically bring big performance improvements for object and sound importers (in some cases 10x).
- Index in a URP project, as this is the baseline right now and it will capture BIRP and URP nicely.
- Make sure to activate SRP conversion under Settings/Import. Activate only the custom converter to save time as it can upgrade materials selectively vs. the Unity one which always scans the whole project. The capabilities should be on par.
- Delete the library folder regularly as it can become very big and slow down Asset Database operations.
- Delete the trash folder regularly as downloaded and deleted content might accumulate there.
- Optimize the database after big operations (Settings/Maintenance menu).
- Deactivate sorting of search results for faster paging.
- Deactivate Search Without Input in the search settings for faster initial loading of the window.
- Less impactful and only do if you are handling large FBX of hundreds of MB: Deactivate FBX dependency scanning. In 95% of cases fbx files do not have dependencies listed inside.