Packages
Overview
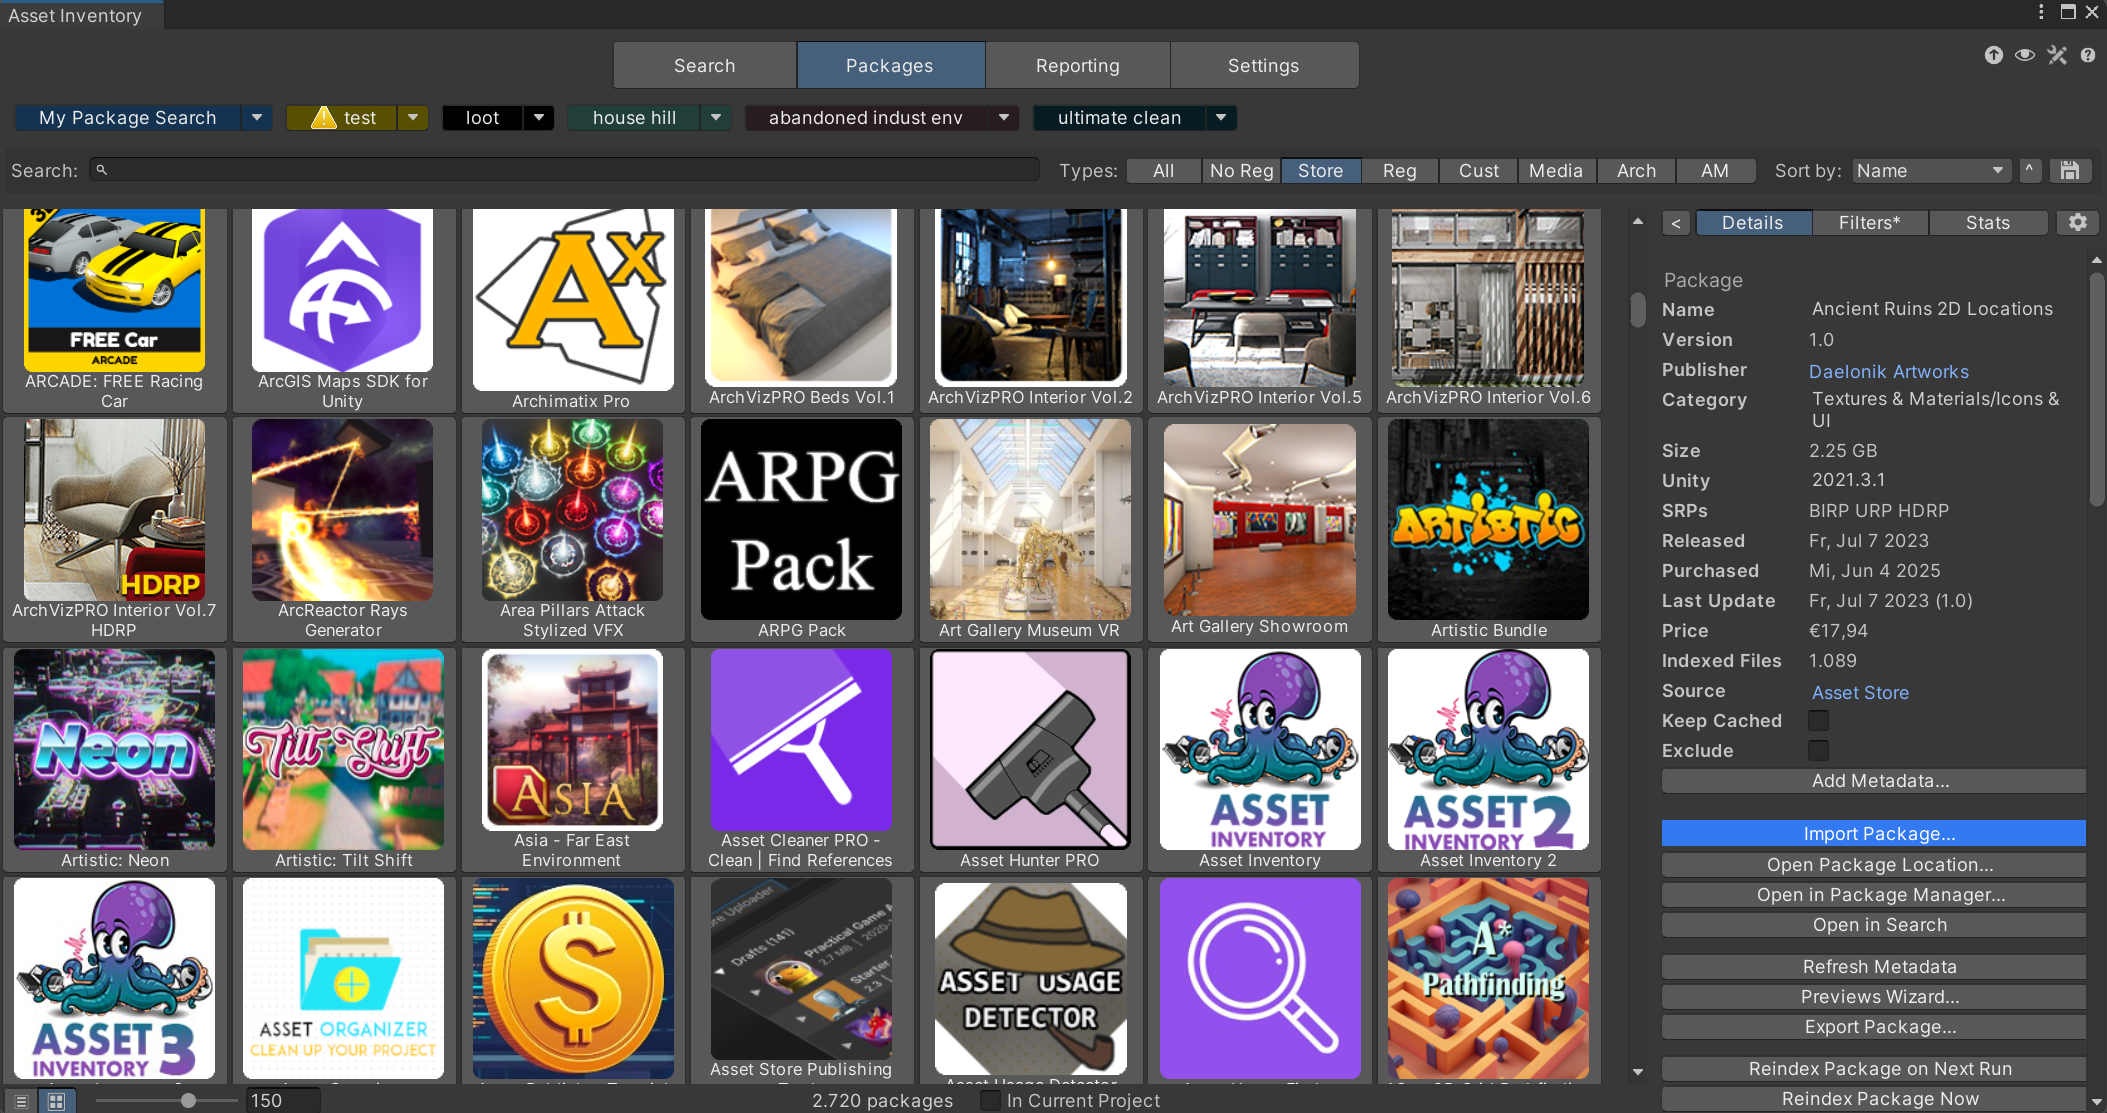
The packages overview will show a list of all packages, indexed or detected in the current project. These can come from multiple sources:
Automatic
- Asset Store purchases
- Registry packages
- Unity Asset Manager
- The local Unity asset cache
- The local Unity package cache
Additional folders stated under Settings
- Unity packages from other sources (e.g. Synty)
- Local asset packages under development (via package.json)
- Local media libraries (sound files, textures, models…)
- Unity projects
- Archives (zip, rar & 7z contents)
The list will indicate which of these were already indexed. To index more packages, download them into the cache or add more additional folders. Display is possible as a plain list or grouped by categories, publishers, state or tags.
In the case of registry packages, only the latest version of the package will be indexed. If a package contains sub-packages (also recursively), they will be shown directly under the package in a tree structure. Double-clicking any package will show the contents in the search.
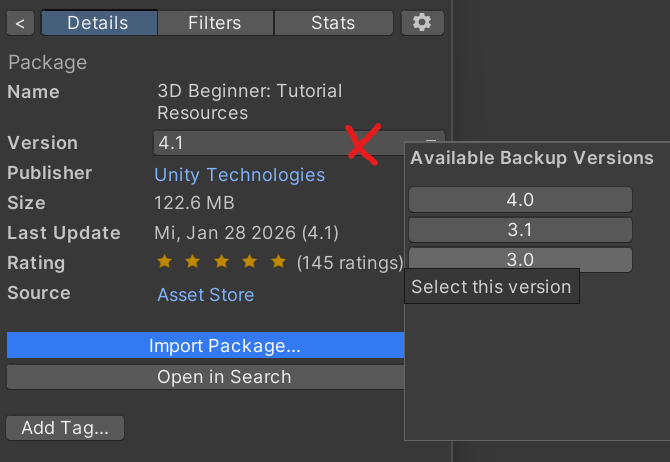
After selecting a package, multiple options will appear. It is possible to fully import it from here. If you enabled backups and previous versions exist, also an older version of a package can be selected to go back to if newer versions contain issues.
Packages can also be partially or completely removed again from the project and also from the database which can be useful after cleaning up outdated assets.

Depending on the package type additional options become visible:
- Registry Packages
- Support for managing the installed version and setting an update strategy (recommended, latest stable compatible, latest compatible, manually).
- Development Packages
- Use directly via file link
- Custom Packages
- Support for connecting to metadata from the Asset Store. This will load the name, description, rating etc. and is especially useful when having downloaded packages from alternative sources like the Humble Bundle to still have all metadata available. See details in Custom Metadata section below.
- Support for disconnecting from the Asset Store again
Using the buttons under the package list, the display can be switched between list and grid style.
Package filters include update date, purchase date, price, package size, Unity version, render pipeline support, publisher, category and tags. Purchase date filters are useful for finding newly acquired assets even when they have not been updated recently.
Settings
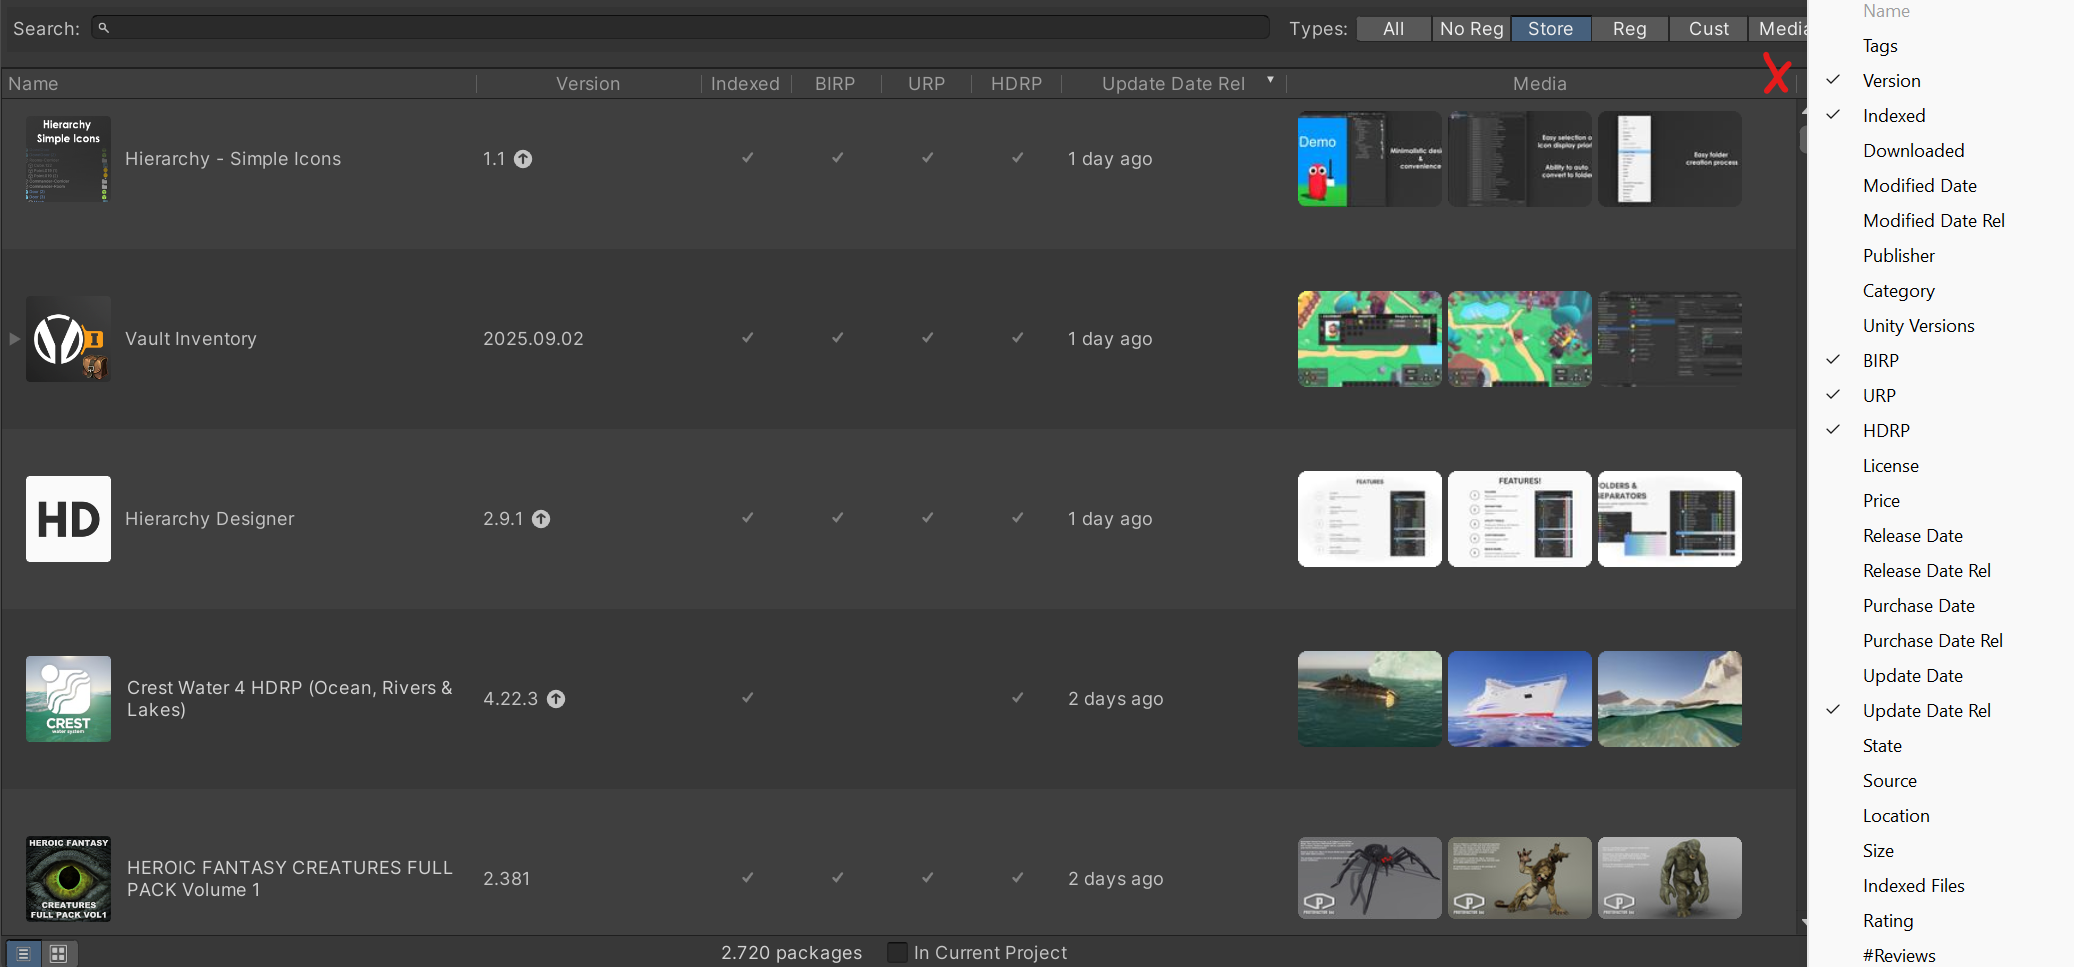
Right-click on any column header to add or remove columns. One special column is Media which will enlarge the list height to show package images right inside the list.
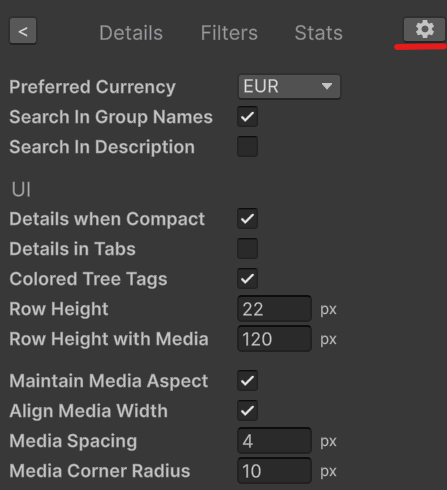
With the settings icon in the inspector additional settings can be done to tailor the search experience. Besides many display properties you can define which currency to use and where text should be searched in when typing in text into the search: Display Name only, additionally in the description of the package or when grouped in the group names (e.g. when grouping by publisher to be able to find a publisher and not only the package).
The right-side package inspector can be hidden from the list footer when you need more horizontal room for package columns or bulk review.
Tagging
Tags will be imported from the Asset Store in case any are set there. In addition, local tags can be added and removed here as well (they are not synchronized back to the Asset Store yet). Bulk editing of tags is possible when selecting multiple items in the tree.
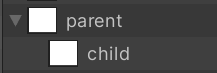
You can drag a tag onto any other tag to create a hierarchy.
Use the No Index package option when a package should stay visible but future indexing should skip its contents.
This replaces the earlier noindex tag workflow. No Index can be changed from package details or bulk actions, and preview recreation, AI captions, code search, and semantic search all honor it.
Custom Metadata
Package metadata like name, publisher, category etc. is extracted directly from the package if the information is contained in there. If it is missing there are four options.
If the package exists on the Asset Store, the package can be linked to the entry there and a lot of metadata will be loaded automatically and also regularly to fetch updates to it.
Copy/paste the URL from the Asset Store website of the asset you want to link, Verify it is detected correctly and click Connect.
Manual Data Entry
Package data can also be edited manually using the “Edit Data…” command visible for packages that are not linked to the Asset Store. This way also custom preview images can be set for archives and custom packages.
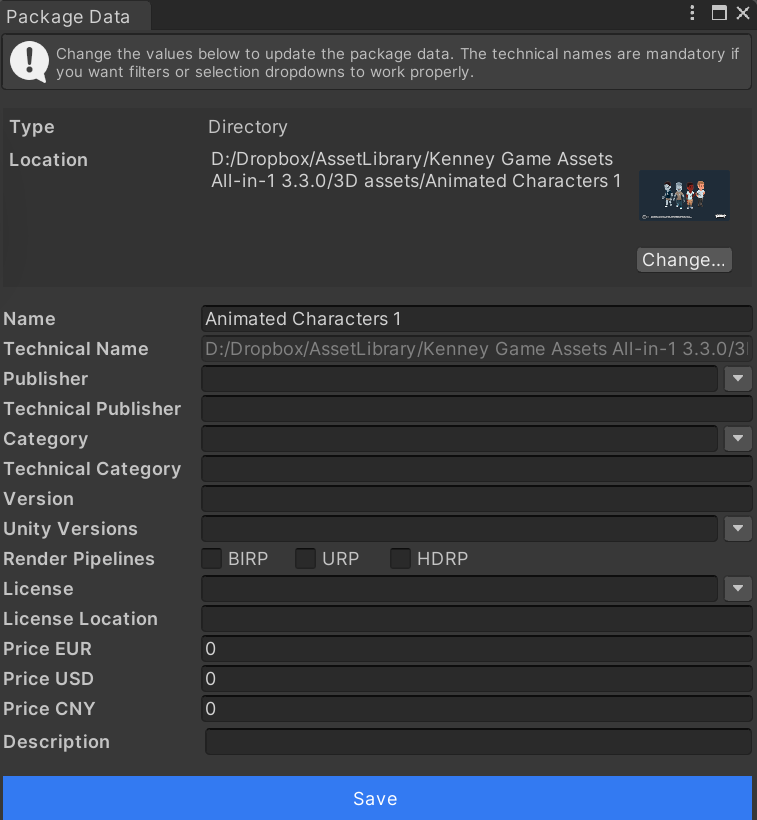
If the metadata fields that are available in the database do not fit or you want to capture additional information, you can define additional fields. These can be of various types to render checkboxes, selection lists, texts, numbers, links or dates. Metadata fields can be restricted to only appear for packages of specific sources, e.g. archives.
Custom field types also include List fields for structured multi-value package metadata. A reserved Max Backups metadata field can override the global backup retention for a package when a specific asset needs more or fewer backup revisions than the default.
Description automatically generated“ src=“/tools/assetinventory/docs/media/32ebb62106ac8bb4.png” loading=“lazy” decoding=“async”>
Description automatically generated“ src=“/tools/assetinventory/docs/media/668fc58901261e2e.png” loading=“lazy” decoding=“async”> <img alt=“A screenshot of a computer
Description automatically generated“ src=“/tools/assetinventory/docs/media/534530e6d1fbc15e.png” loading=“lazy” decoding=“async”>
Usually Asset Store packages will bring a preview image for the package included. If you want to override it or if you have custom packages you can associate a dedicated preview image by placing an image next to the package file. This needs to be named like the package file with the suffix “.icon.png”.
The last option is to create an Override Json file containing metadata. This needs to be named like the package file with the suffix “.overrides.json”. This overrides file can contain any data a package can hold and also a list of tags in addition. If defined in there, this data will override any existing data read from the Asset Store or the header file.
The advantage of this method is that such files can be put in a central location, so everybody who will index the location has the same metadata. This ensures for example the common use of tags and categories if working in a team.

Description automatically generated“ src=“/tools/assetinventory/docs/media/951ce875fac523bf.png” loading=“lazy” decoding=“async”>
To make it easier to create package override files, the Package Export supports to create these conveniently for an individual or also a list of packages.
Importing packages can happen one-by-one and in bulk while multiple packages are selected. Both interactive and automatic mode is available. In addition, a custom root folder under which assets should be imported can be selected. This is especially helpful if the “/Assets” root should be kept clean and organized.
Some packages do not support custom locations and always need to be installed into the /Assets folder, e.g. when using hard-coded paths. There is an exclusion list inside the tool to handle such cases automatically. If you encounter a package that does not work in a custom folder, please submit the package name & link on the support Discord.
If backups are available, you can go back to previous versions of an asset which can be helpful if the package author changed something incompatibly or there are issues. If multiple versions exist, the version label will change into a dropdown field.
Packages from registries will be added to the project manifest. If registry packages need a custom scoped registry this will also be added automatically.
Importing an archive will extract the archive into the target folder.
Once a package is imported into the project, it can also be uninstalled again. Registry packages will be uninstalled completely. In case of other assets, An Uninstall Package… button will appear. This will bring up a detailed view of all files installed from that package, their current location and it will perform an analysis which files are in use by other files in your project and show a warning if so. This way you can fully or partially uninstall packages.
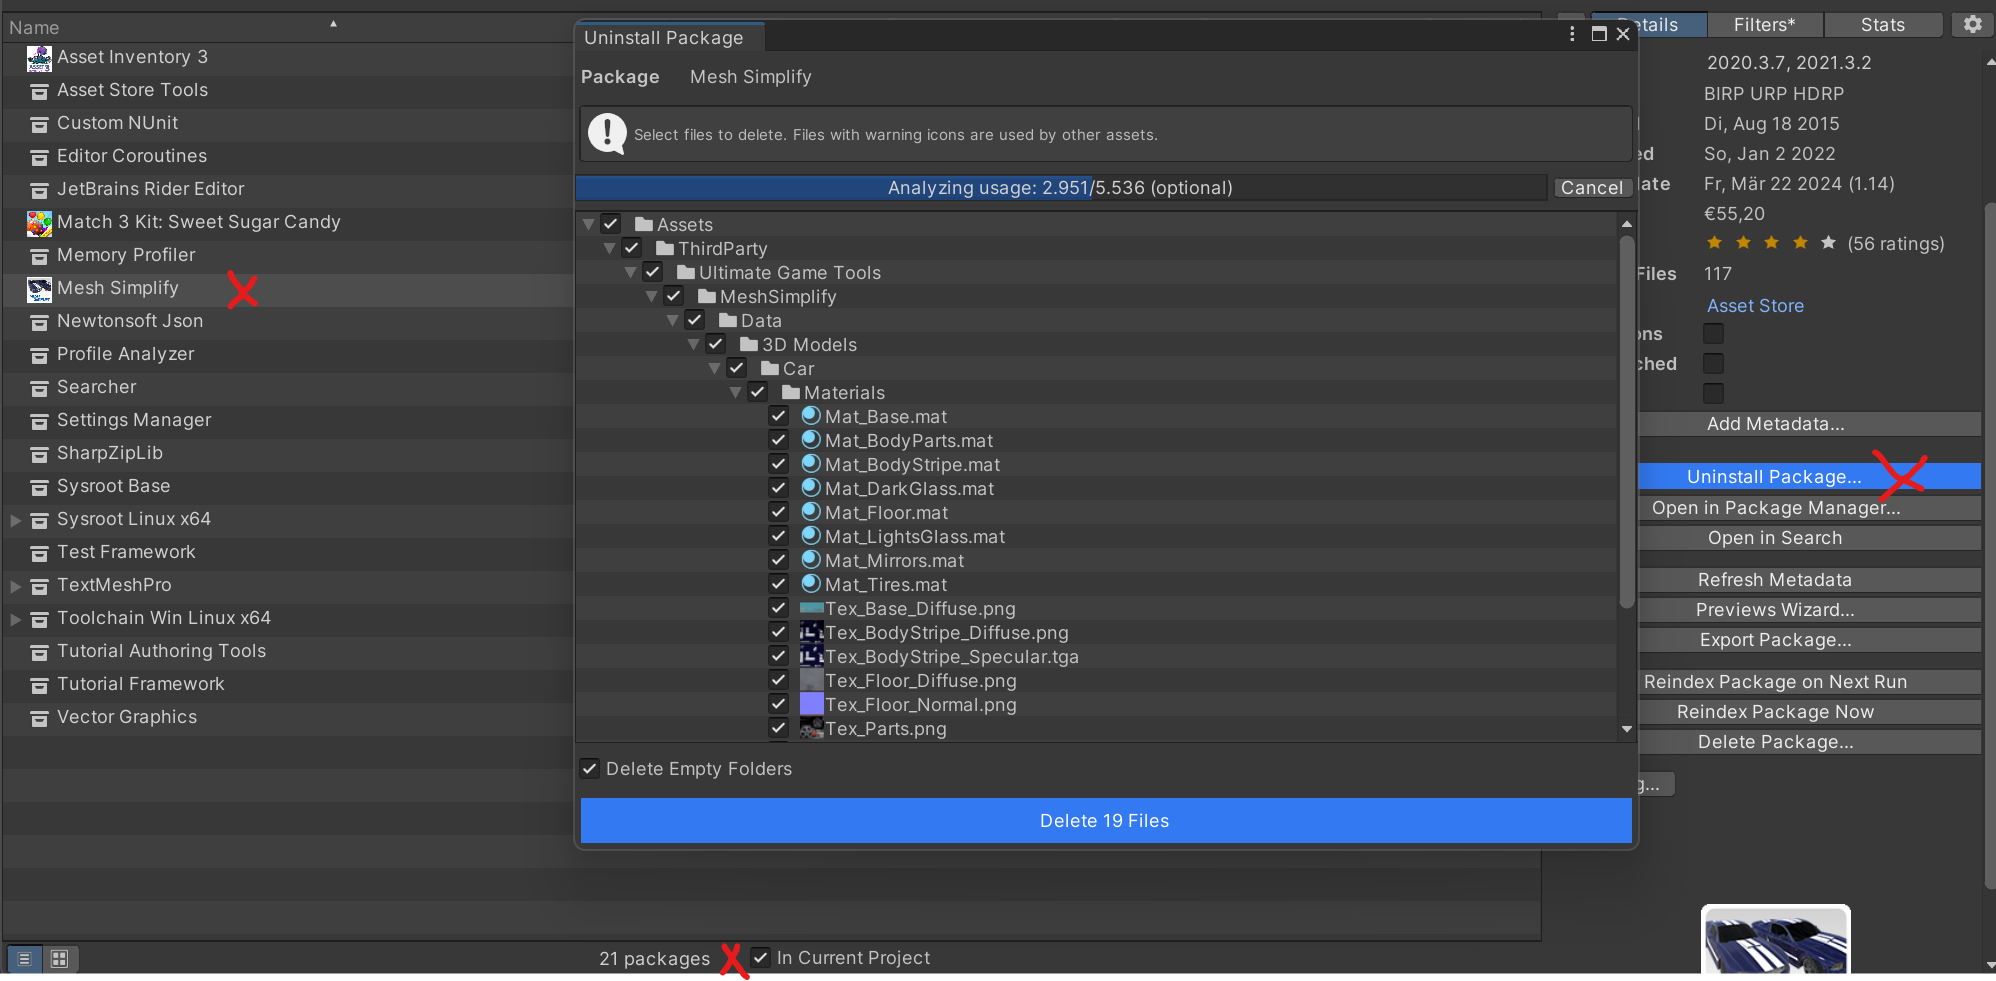
The same feature exists also for individual assets when called from the Search page after selecting a search result.
Hiding Results
It can be desirable to hide assets from search results when these are not used, outdated or not interesting for other reasons. There are multiple mechanisms to do so and they can all be combined.
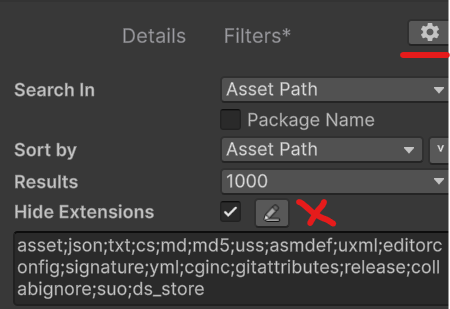
The search will filter out some file types automatically to not clutter the results. This can be adjusted in the search settings.
In case packages should not appear in the search results and not be indexed, the Exclude toggle can be used in the package details section. Excluded items will disappear from the list and can be reactivated using the “Excluded” maintenance view.
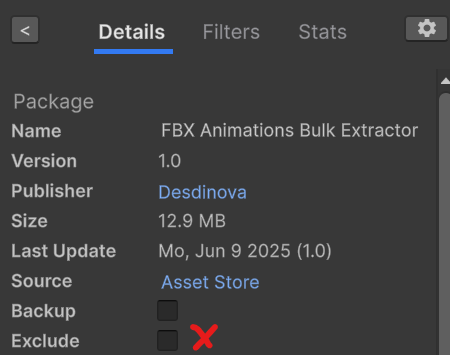
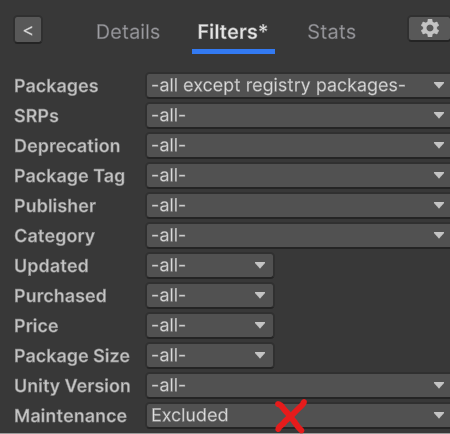
It is also possible to just hide specific files, folders and extensions from a single package. Use the Hide Content action in the package details or on any current search result.

The system is highly performant and will improve search performance more rather than reducing it.
The search filter can show Hidden Files again for review, undoing accidental hides or validating package-level hide rules before applying broader cleanup.
The Hide Content window supports both hide rules and include rules. Hide mode removes selected files, folders or patterns from normal search results. Include mode works like a whitelist and keeps only the selected content visible, which is useful for very large packages where only a small subset is relevant.
Advanced
Bulk selection will show the total size of the compressed assets before they are downloaded so that you can estimate if temporarily downloading all for indexing would still fit on the hard drive. If available also costs are shown (current, non-discounted).
Description automatically generated“ src=“/tools/assetinventory/docs/media/7e9226909478b390.png” loading=“lazy” decoding=“async”>
Holding CTRL will reveal a lot of additional package data and also many actions.