Your First Animated Text
Requirements, installation, and verification
Text Studio supports Unity 2023.2 or newer. TextMeshPro is included with Unity UI 2.0.0 in Unity 2023.2. Import Text Studio first, allow Unity to finish compilation, and import TMP Essential Resources when the project has not used TextMeshPro before. Optional integrations are imported only after their companion package is installed.
- Confirm that Tools > Text Studio contains Welcome, About, Gallery, Recipes, Health Check, and the setup commands.
- Create one world-space and one Canvas text object and confirm that both show a Text Studio inspector without missing-script warnings.
- Open Health Check and resolve missing TMP resources, duplicate event systems, unavailable renderers, or invalid project settings before authoring content.
- Keep the base package working before adding optional integration packages. A missing companion must never be required for ordinary Text Studio use.
Adapt an existing TextMeshPro object
Select an existing TextMeshPro or TextMeshProUGUI object and use its setup card to add Text Studio. The setup preserves the current text, font, layout, material, alignment, and Canvas or world-space role. After setup, edit the authored line through Text Studio Raw mode. Text Studio remains the source owner during Live Preview and Play Mode so direct backend writes cannot silently discard markup.
- Record the existing TMP text, overflow, font, and material settings when the object is production-critical.
- Add Text Studio from the setup card and confirm that Raw contains the expected source.
- Switch to Live, preview one effect, and check wrapping, alignment, material appearance, and layout bounds.
- Update external scripts to call TextStudioText.SetText or TextStudioApi.ShowText instead of assigning TMP text directly.
Step 1: Create the text
Choose GameObject > Text Studio > Animated TMP Text for world-space text, or Animated TMP Text (UI) for a Canvas. Text Studio creates a ready-to-edit TextMeshPro object and connects the animation workflow automatically. For an existing text object, use its setup card. Text Studio selects an attached compatible backend such as UniText 3 automatically and falls back to TextMeshPro when needed. When Text Studio 3D is installed, eligible world-space objects also offer one-click 3D setup.
Step 2: Write the source
Open Content and enter the line your player should read. Use Raw when you want to edit the source. Use Live when you want to experience the resolved result.
You found a <shimmer>legendary reward</shimmer>!
Step 3: Preview and adjust
Press Play in the inspector preview. Start with the effect defaults, then adjust only the strength, speed, timing, or area that helps the line. The preview controls never rewrite your authoring settings.
Step 4: Choose how it appears
Open Typewriter. Choose Instant for a finished label, By Glyph for dialogue, By Word for subtitles, or By Line for staged instructions. Press Restart to experience the complete reveal again.
Success checkpoint: You should now see the final text, a visible effect, and a repeatable reveal without entering Play Mode.
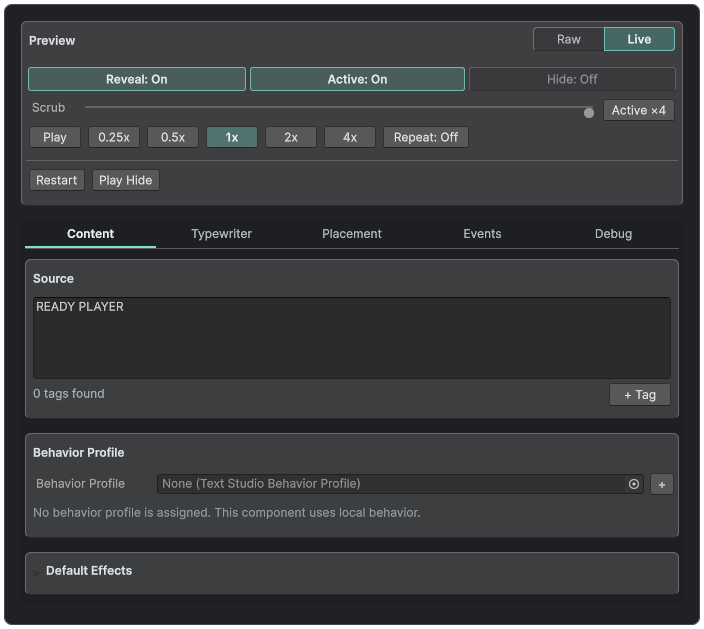
The main Text Studio inspector keeps source, typewriter, placement, events, debugging, and preview in one flow.